How to Make Traditional Takuan | Sun-Dried Daikon Pickled in Rice Bran
Dry the radish, mix the bran and salt, and wait. That's all it takes for that unforgettable flavor
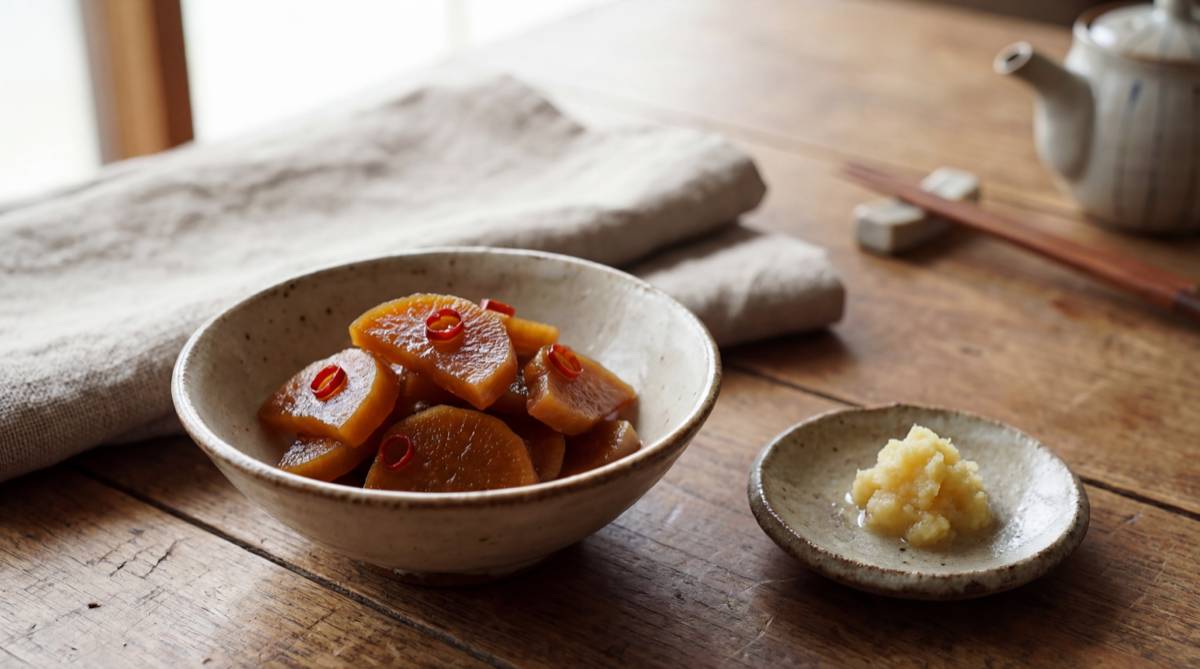
Store-bought takuan is always too sweet. What you remember from childhood tasted different -- slightly sour, wonderfully crunchy, with a deep umami that built with each bite. That was grandma's takuan, made each autumn with sun-dried daikon and a barrel of rice bran.
Store-bought takuan is always too sweet. What I remember from childhood tasted different -- slightly sour, wonderfully crunchy, with a deep umami that built with each bite. That was grandma's takuan, made each autumn when rows of daikon hung from the eaves, then packed into a big wooden barrel with rice bran.
"Takuan isn't something you buy," grandma used to say.
This article walks you through making traditional takuan from start to finish -- from drying the daikon through to fermentation -- with enough detail for a complete beginner.
Traditional Takuan in 3 Steps
The entire process comes down to three things:
Step 1: Dry the daikon (7-10 days). In November or December, hang whole daikon radishes under the eaves or on a balcony to dry.
Step 2: Pack with rice bran and salt. Layer the dried daikon with rice bran (15-20% of the dried weight) and salt (5-6% of the dried weight) in a pickling barrel.
Step 3: Wait 1+ months. Store in a cool place and let fermentation do its work. At 2-3 months, you'll have that deep, old-fashioned flavor.
No special tools or skills required. It takes time, but very little active effort. The winter cold does most of the work.
What Makes Traditional Takuan Different from Store-Bought
Most commercially sold takuan is "seasoned takuan" -- daikon soaked briefly in a flavored brine with artificial sweeteners and yellow food coloring. It's convenient and tasty, but it's a completely different product from what grandma made.
Traditional takuan is sun-dried daikon fermented in rice bran and salt through natural lactic acid fermentation. Drying concentrates the radish's flavor and creates that signature crunch, while the bran's enzymes and beneficial bacteria slowly develop deep, complex umami. The distinctive aroma and golden color are natural results of the bran.
Before refrigeration, takuan was precious preserved food that sustained families from late autumn through spring. When daikon was plentiful in fall, grandma pickled enough to last the winter. For her kitchen, takuan was both "food" and "wisdom."
Ingredients for Traditional Takuan
The ingredient list is remarkably short:
Basic ingredients (for about 10 daikon):
- Daikon radish: 10 (about 10kg before drying)
- Rice bran (nuka): 15-20% of dried daikon weight (about 700g-1kg)
- Salt: 5-6% of dried daikon weight (about 250-300g)
- Dried red chili peppers: 3-5
- Kombu kelp: about 20cm (optional)
- Dried persimmon peels: a handful (optional, adds sweetness)
Choosing daikon:
Slimmer, straighter radishes are easier to dry. Farm-stand daikon with leaves still attached is ideal -- the leaves are used for tying during drying and can be pickled alongside the radish.
Rice bran:
Often available free from rice-polishing shops. Also sold at supermarkets and rice stores. Fresh bran has the best aroma.
Grandma might have said, "Bran and salt are all you need. Everything else is just for fun." The chili peppers serve a preservative role, so include those if you can. Persimmon peels and kombu are the "house secrets" that made each grandmother's version unique.
Step-by-Step: Drying Through Pickling
Step 1: Drying the Daikon (7-10 Days)
Takuan-making starts with drying. This may be the most important step.
Timing: November to early December, when temperatures drop below 10C (50F) and the air is dry.
1. Trim daikon leaves to about 3cm. Wash off soil, but don't peel.
2. Tie pairs of daikon together at the leaf base with string.
3. Hang in a well-ventilated, shaded spot -- under eaves or on a balcony.
4. Leave for 7-10 days. Bring inside or under cover during rain.
How to tell they're ready: When you can bend a daikon into a gentle "U" shape. They should feel pliable and flexible, weighing roughly half to two-thirds of their original weight. Over-drying makes them too hard to pickle properly.
The sight of rows of daikon hanging under the eaves was the signal that winter was approaching. That scene meant "it's takuan season again."
For more detail on the drying process, see How to dry daikon for takuan.
Step 2: Prepare the Bran Mixture
Once the daikon are ready, prepare for pickling:
1. In a large bowl, combine rice bran and salt. Mix thoroughly by hand.
2. Remove chili stems, slice into small rounds (seeds and all), and add.
3. Cut kombu into small pieces and add (if using).
4. Tear dried persimmon peels by hand and add (if using).
Mix until everything is evenly distributed. Do not add water -- the daikon will release their own moisture.
Step 3: Pack the Barrel
You'll need: A pickling barrel or plastic pickling container, weights (2-3 times the weight of the dried daikon), and a pressing lid.
1. Spread a thin layer of the bran mixture (about 1cm) on the bottom of the barrel.
2. Arrange dried daikon in a snug layer -- they're flexible enough to curve to fit the barrel.
3. Sprinkle bran mixture evenly over the daikon.
4. Repeat layers: daikon, bran, daikon, bran. Finish with bran on top.
5. Place the pressing lid and set weights on top.
6. Store in a cool, dark place (entryway, hallway, north-facing room).
Key point: Pack the daikon tightly with no gaps. Air pockets invite mold. The daikon leaves can be pickled alongside -- they're delicious too.
Step 4: Wait for Fermentation (1-3 Months)
From here, patience is the only ingredient.
- After 2-3 days: Liquid should rise above the daikon. If not, add more weight.
- After 1-2 weeks: The characteristic pickled aroma develops. Still at the light-pickle stage.
- After 1 month: Ready to eat if you prefer a milder flavor.
- After 2-3 months: Fully fermented with that deep, traditional taste. This is grandma's "just right."
As fermentation progresses, the color turns golden yellow and the flavor deepens. Watching this transformation is part of the joy of making takuan.
Troubleshooting Tips
Key points for first-time takuan makers. For a comprehensive guide, see Avoiding common takuan mistakes.
Mold Prevention
- Getting liquid to rise within 2-3 days is critical. Add weight if it hasn't.
- White film on the surface (kahm yeast) is harmless -- just remove it.
- Black or red mold: remove affected bran and daikon.
- Wipe barrel edges and pressing lid with alcohol (shochu works well) periodically.
Salt Balance
- Too little salt risks spoilage; too much makes it inedibly salty. Aim for 5-6% of dried daikon weight.
- For sweeter results, stay closer to 5%. For longer preservation, go toward 6%.
- Traditional takuan is meant to be on the salty side -- "a bit salty" is perfect with rice. If it turns out too salty, see What to do with overly salty takuan.
Storage
- Keep in the barrel in a cool spot. Winter room temperature is fine. See Takuan storage guide for details.
- As spring temperatures rise, sourness intensifies. Move to the refrigerator or freeze in portions.
- Even over-soured takuan shouldn't be discarded. Dice it for fried rice, or simmer it.
Speaking of re-purposing old takuan:
Turning aged pickles into simmered dishes is quintessential grandma wisdom. "Throwing food away? What a waste!" -- her philosophy always found a new use.
Frequently Asked Questions
Q. How long does takuan take to make?
About 1 month from pickling until it's edible. For the full traditional flavor, allow 2-3 months. Including the drying period (7-10 days), the minimum timeline is about 40 days.
Q. Can I make takuan without drying the daikon?
You can pickle fresh daikon using a salt-pressing method, but the result is fundamentally different. Drying removes moisture, creates that signature crunch, and concentrates umami. That "snap" when you bite is only possible with dried daikon.
Q. Can I dry daikon on an apartment balcony?
Absolutely. As long as there's good airflow and not too much direct sunlight, it works fine. Hang them from a laundry pole with string. Just make sure they're protected from rain.
Q. What kind of daikon works best for takuan?
Standard green-top daikon works, but pickling varieties (Nerima daikon, Miura daikon) have denser flesh that produces crunchier results. If those aren't available, regular supermarket daikon is perfectly fine -- just choose slimmer ones for easier drying.
Q. Can I make takuan without rice bran?
Not traditional takuan, no. The bran's enzymes and lactic acid bacteria are what create the distinctive flavor and golden color. Rice bran is often available free from rice-polishing shops. Some supermarkets also sell toasted rice bran (irinuka) in the baking section.
Ready to Try?
Traditional takuan-making is disarmingly simple.
Dry the daikon. Mix with bran and salt. Wait.
That's all it takes to produce pickles with a depth and warmth that no factory can replicate.
Yes, your first attempt might bring some anxiety. But grandma learned from someone too, and refined her technique over years of practice.
The feel of a daikon bending into a U-shape, the earthy scent of mixing bran by hand, the developing aroma of fermentation wafting from the barrel -- these are satisfactions that grabbing a package off a shelf will never provide.
This winter, buy 10 daikon, and hang them up to dry.
May grandma's kitchen wisdom find its way to your table too.
More of grandma's preserved food recipes here.